
For this card I decided to take on two challenges!! The first challenge was
Kristina Werner's Color Inspiration Challenge. The colors for this week were Pumpkin Pie, Ruby Red, Sage Shadow, and Whisper White. The second challenge was the Sketch Challenge over at Splitcoast (
SC200). So what do you think?
I used all of the colors from the challenge in ink and card stock. However I could not find my pumpkin pie ink, so I decided to use Tangerine Tango instead. I used several stamp sets from Stampin' Up! I used the butterfly from Dreams du Jour and the thank you is from the Cute and Curly set. I also used the Bella Toile background stamp. I used the curly label punch. I added the white taffeta ribbon as well.
Thanks for stopping by and I wish you a very creative day!!!


This is a gift card holder that I made for my sister-in-law, Ginger! I used Stampin' Up!'s exclusive Top Note Die for the Sizzix Big shot. I punched out the die in chocolate chip card stock and in the new Autumn Vine dsp. (Love this dsp! You have got to check it out! Click on the Shop with me link under Stampin' Up! on the side tool bar. Then click shop now to check it out! ) Anyway...back to the holder. I cut off the edge of the top note dsp along to dotted lines. I used the word window punch and punched out a slot for the gift card. I also used a stamp from the Say It with Scallops stamps set in chocolate chip classic ink on whisper white cs. I then punched that out along with some of the dsp from the same Autumn Vine set with the scallop square punch. I made a larger scallop square using several scallop squares from the DSP. I also added a baja breeze flower from the Flower Fusion Too kit with a silver brad. For the corner, I used a jumbo antique brass eyelet with the crop-a-dile and a 5/8" chocolate chip grosgrain ribbon.
Thanks for stopping by and I wish you a very creative day!!!

I made this card for my sister-in-laws birthday! I was still in Virginia at Gaylyn's house (my other wonderful sister-in-law), so I used some of her goodies to create it!!! :O) Check out the picture below to see my inspiration!
I used whisper white, riding hood red, and chocolate chip card stock. For ink, I used chocolate chip and riding hood red classic inks. I used the Pocket Silhouettes, Baroque Motifs, Cute and Curly, and the hostess set called Best Yet. For the background I used the swirls from the Baroque Motifs set and a strip of chocolate chip card stock. I used the SU's exclusive Top Note die with the Big Shot with the riding hood red and whisper white. I stamped that with a stamp from the Pocket Silhouettes set onto the whisper white. I first inked the stamp in riding hood red and then used my chocolate chip marker to color in the stems. I stamped the image once and then again on both sides of the main image without re-inking the stamp. I used the curly label punch. I punched out with chocolate chip cs and then the stamped image from the Cute and Curly set and the Best Yet Set. I had masked the thank you from that stamp from the Cute and Curly set with tape before I inked the stamp. (Using tape is a great way to quickly mask something.) I used the stamp-a-ma-jig to place the words inside the stamped image. I cut out the "you" stamped in riding hood red and used dimensionals to layer all of the pieces. I added a riding hood red button tied to chocolate chip 5/8 grosgrain ribbon with linen thread to the corner with glue dots. I also sponged the edges of everything in chocolate chip before I glued it all together.

Here is a picture of my inspiration for this card. I picked out this coffee cup at Starbucks and thought I would make a card to match. What do you think?
Thanks for stopping by and I wish you a very creative day!!!
P.S. I added this color combo to my SUColorQ account! Just love this combo!!!

I made this Thank you card for my husband's cousin and his wife! They were so kind to let us! I used Stampin' Up!'s Baroque Motifs and Cute & Curly stamp sets. I used whisper white, chocolate chip, and a bit of certainly celery card stock. For ink, I used pink pirouette, baja breeze, and chocolate chip. When stamping the pink pirouette and baja breeze for the background I stamped off first onto a scrap piece of paper and then stamped onto my card. This made the image a bit softer. I used the curly label punch to punch out a piece of cc card stock and the stamped thank you. I then cut out the thank you along the lines so that I was able to mat it to the cc piece with dimensionals. I attached a baja breeze and pink pirouette flower from Flower Fusion Too to the label with a silver brad. To make the leaves of the flower I punched out flowers from the blossom punch in certainly celery and cut the middle size flower to create the leaves.
Thanks for stopping by and I wish you a very creative day!!!

These are the onesies that I created for my new little nephew!! I used several fun Stampin' Up! sets. The inks I used are Palette inks from Papertrey. They are a hybrid ink. I used spring moss, burnt umber, summer sunrise, and lemon tart. Before you can start to stamp on fabric, you need to wash it and them dry it without fabric softener. The stamp your images with some sort of cardboard so the ink does not bleed through. Then you will need to heat set your stamped images. I did this by placing the onesies in the dryer for 15 minutes on high heat.

For the one on the left, I used the bear from the retired set called Happy Camper. The star stamp and the saying are from Under the Stars. For the middle one, I used the Bronc Buster set. For the one on the right, I used the Bugs and Kisses set. I also stamped on the back side and the sleeves of each of them too! Oh and I have to add that I did use the Stamp-a-ma-jig to help me position my stamps just right!!!
Thanks for stopping by and I wish you a very creative day!!!
.JPG)
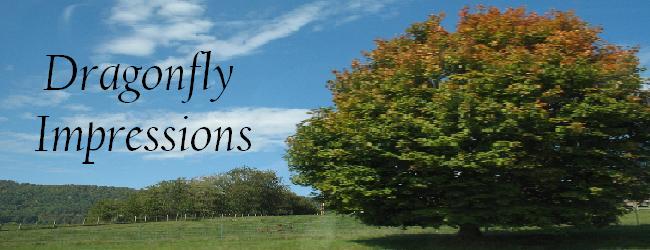
It has been a long time! I was on vacation for the past several weeks to Virginia! Here is a fall picture for you! The picture is of a tree at the Peaks of Otter. It was gorgeous!! We visited my sisters-in-law and their families (Hi Gaylyn and Ginger!), my husband was in a movie called Max VO2, and I got to see my Stampin' Up! ladies!!! My mother-in-law was able to come this us too! (Hi Nana!) I have lots of fun projects to post that I made while I was out there. It was a great vacation!!
.JPG) This is a picture of some of my SU ladies at a business meeting! Oh did you see the matching pretty aprons...I am the one on the left and my sister-in-law is the one in the middle... she gave me the beautiful apron from SU for my birthday! Isn't she so sweet!
This is a picture of some of my SU ladies at a business meeting! Oh did you see the matching pretty aprons...I am the one on the left and my sister-in-law is the one in the middle... she gave me the beautiful apron from SU for my birthday! Isn't she so sweet!
.JPG) This picture is of few SU girls... Gaylyn of The Daily Ink, Beverly of Beestamper, and me at our meeting.
This picture is of few SU girls... Gaylyn of The Daily Ink, Beverly of Beestamper, and me at our meeting.
I will post more projects soon! Thanks for stopping by and I wish you a very creative day!!!
PS. Sorry to my sisters and fellow bloggers if I have not been by your site lately...I am trying to catch up with my google reader!! I love that thing!! I do not miss any exciting blog posts from any of you!!! :O)

I created this card for a swap with my group of demonstrators. I used the Autumn Harvest stamp set. I used very vanilla and chocolate chip card stock. I used chocolate chip and tangerine tango ink pads. I used apricot appeal, always artichoke, old olive, mellow moss, and barely banana markers. I also used the blender pen. This is also my very first tutorial!!! This is a masking tutorial!! It is quick and simple and does not require a lot of extras! It adds a wonderful element to any stamped project!! I am so excited to be able share and to do this with the help of my family, Gaylyn (
The Daily Ink) and Georgia!!!

To create the main image I had to use the masking technique. First I stamped the smaller pumpkin and then the gourd onto a piece of scratch paper. I cut them out.

Then I took my card stock and stamped the two images a little bit apart. I used the cut outs and placed them on top. I then stamped the larger pumpkin in the middle.

I then colored in the images with my markers and blender pen. I tied the chocolate chip 5/8 grosgrain ribbon to the corner. I also used my scallop punch on the chocolate chip strip across the card.
Thanks for stopping by and I wish you a very creative day!!!
Copyright
All content (including text, photographs, and design work) is © Kari Vertican. My original artwork is for personal inspiration only and may not be copied for publication or contest submission. Thank you so much!


.JPG)
.JPG)
.JPG)


.JPG)


.jpg)